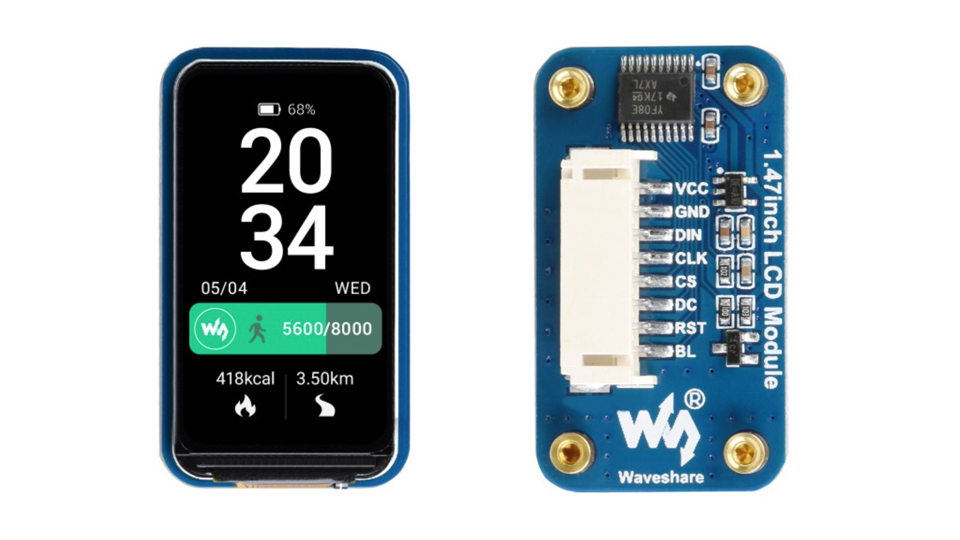
Waveshare has a good set of cost effective LCD modules that can be interfaced easily with an Arduino/ESP32 or a Raspberry PI. There are a lot of such modules ranging from 0.96 inches all the way up to 15.6 inches in size. Majority of the smaller modules use SPI for interfacing with a micro controller. One of the few things that sets Waveshare apart from other such chinese manufacturers is their documentation. They offer excellent documentation for all of their products including schematics, example code and even tips & tricks to get started pretty quickly.

The 1.47" LCD module is no exception, they’ve tutorials for interfacing this module with Arduino & Raspberry PI. However, I couldn’t find any tutorials or guides for interfacing this module with an ESP32, maybe it was trivial and nobody cared to do a write up.
I came across this module while looking for a small LCD screen for an in-car display project. I wanted a small LCD module that can be used to show a few engine parameters of my car. Form factor and size was a deciding factor and this module was an exact fit for my use case. Wanted to use an ESP32 for the project as it has a built in CAN bus controller and is powerful enough to process a bunch of CAN frames in a second while rendering things on a display.
For the software side of things, Arduino was the platform of choice & the excellent LVGL library for the UI development.
Hardware Setup
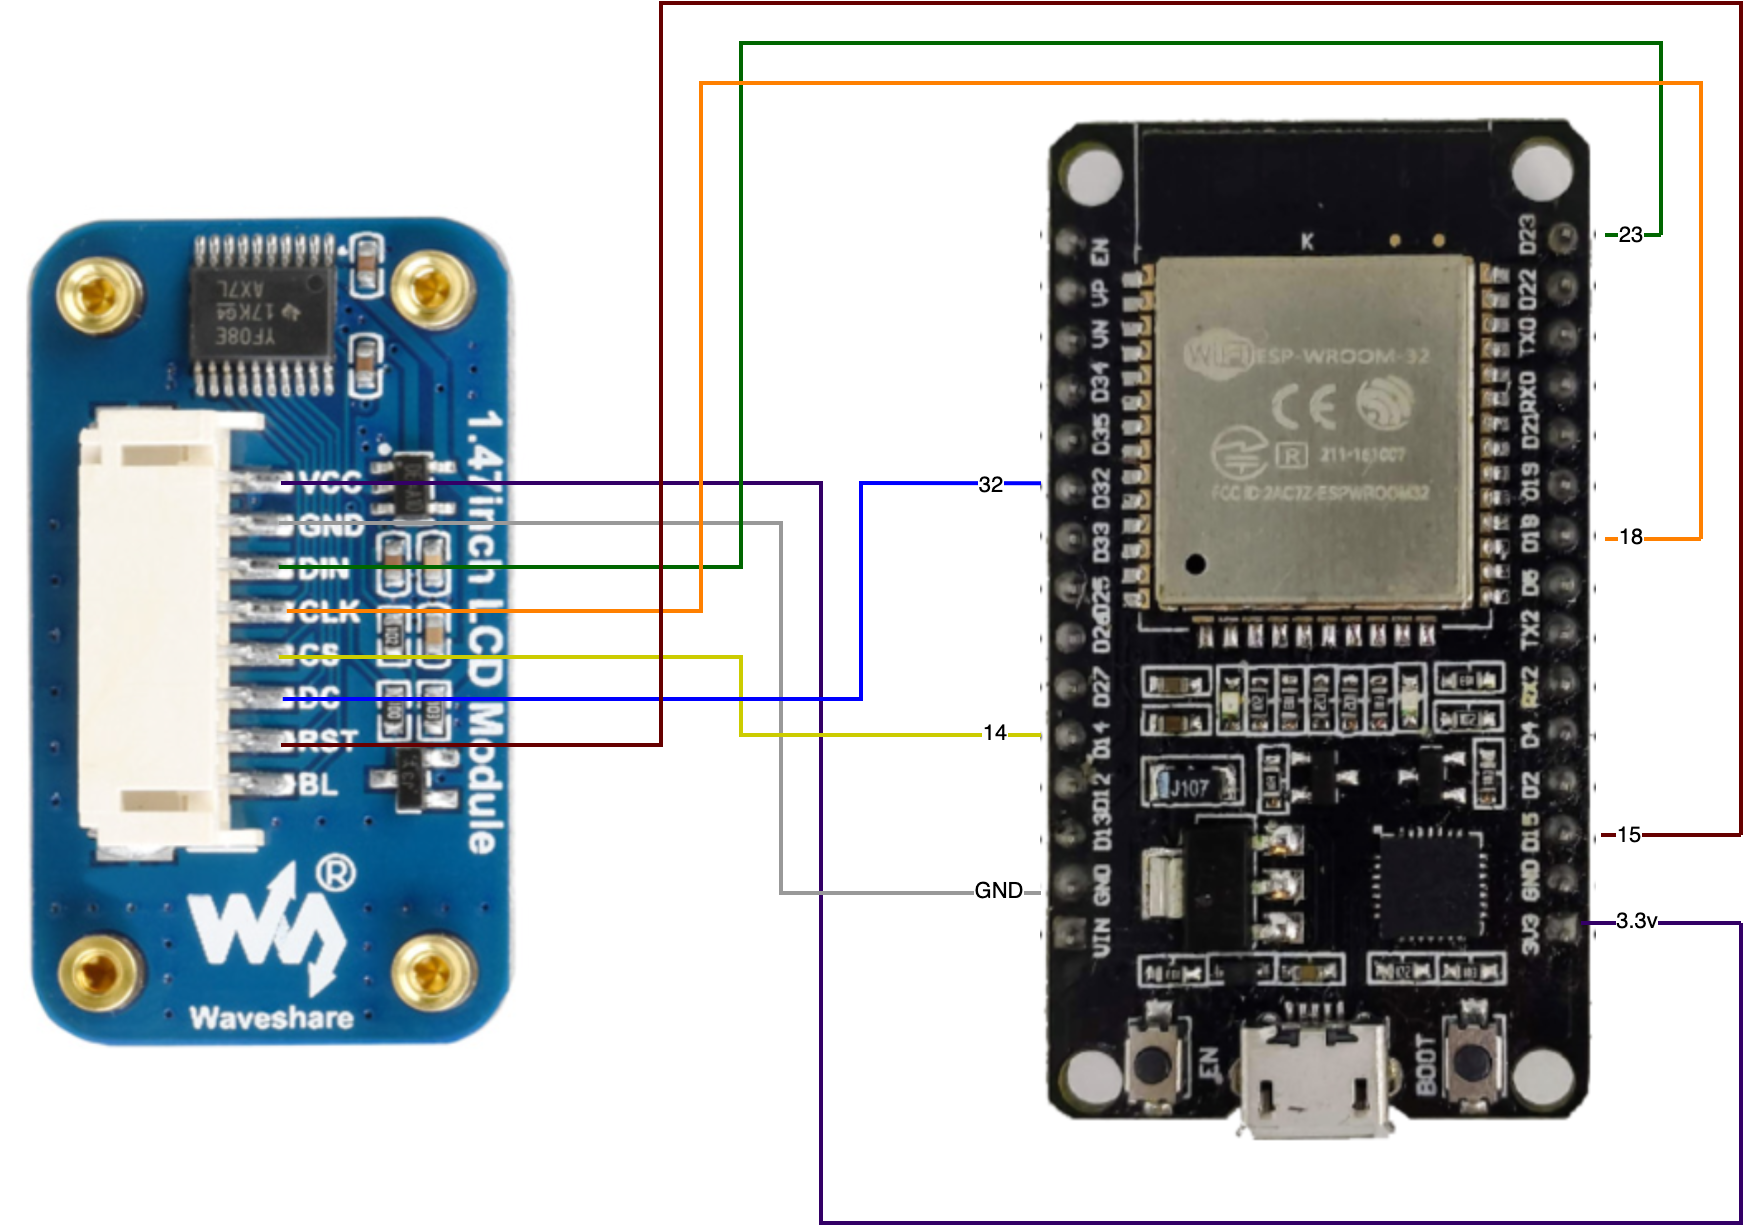
The module comes with a cable with an 8 pin JST connector on one end and dupont female connectors on the other end for easy connections. Below diagram shows the hardware setup/pin diagram for the project.

LCD Module-ESP32 Pin mappings are as follows:
| LCD Module PIN | ESP32 PIN |
|---|---|
| VCC | 3V3 |
| GND | GND |
| DIN | 23 |
| CLK | 18 |
| CS | 14 |
| DC | 32 |
| RST | 15 |
| BL | - |
You can leave the backlight pin(BL) of the LCD module hanging, no need to connect this PIN as the backlight is driven by the LCD controller chip through SPI.
Software Setup
Assuming you have LVGL installed and configured correctly(skipping LVGL setup for brevity), the code is pretty straight forward. The module uses the ST7789 LCD controller. The Arduino GFX libary has the correct drivers for the controller. You need to initialise the driver with correct pins & interface(configured via the Arduino_DataBus type) and define a simple display flushing callback for the LVGL library. Relevant parts below:
//Data bus definition
Arduino_DataBus *bus = new Arduino_ESP32SPI(32 /* DC */, 14 /* CS */, 18 /* SCK */, 23 /* MOSI */, -1 /* MISO */, VSPI /* spi_num */);
//Graphics handle init
Arduino_GFX *gfx = new Arduino_ST7789(bus, 33 /* RST */, 1 /* rotation */, true /* IPS */);
The above lines will create a driver handle that can be used to draw images on the LCD. Below is a simple display flushing function - this function will write the LVGL output to the LCD display:
void disp_flush(lv_disp_drv_t *disp, const lv_area_t *area, lv_color_t *color_p) {
  uint32_t w = (area->x2 - area->x1 + 1);
  uint32_t h = (area->y2 - area->y1 + 1);
  gfx->draw16bitBeRGBBitmap(area->x1, area->y1, (uint16_t *)&color_p->full, w, h);
  lv_disp_flush_ready(disp);
}
Next function is responsible for setting up the LVGL library, it sets the display resolution, relevant callbacks and also initialises the input device driver(lv_indev_drv_register()).
void lvglInit() {
  lv_disp_draw_buf_init(&draw_buf, disp_draw_buf, NULL, screenWidth * 10);
  lv_disp_drv_init(&disp_drv);
  disp_drv.hor_res = screenWidth;
  disp_drv.ver_res = screenHeight;
  disp_drv.flush_cb = disp_flush;
  disp_drv.draw_buf = &draw_buf;
  lv_disp_drv_register(&disp_drv);
  static lv_indev_drv_t indev_drv;
  lv_indev_drv_init(&indev_drv);
  indev_drv.type = LV_INDEV_TYPE_POINTER;
  lv_indev_drv_register(&indev_drv);
}
Above code sections are pretty much the boilerplate code for any LVGL project. Next we define an LVGL screen. The function creates a new screen and adds an animated label to it & loads it on the screen:
void main_Screen() {
  lv_obj_t *scr = lv_obj_create(NULL);
  static lv_style_t style_title;
  static const lv_font_t *font_large;
  static const lv_font_t *font_normal;
  font_large = &lv_font_montserrat_30;
  lv_style_init(&style_title);
  lv_style_set_text_font(&style_title, font_large);
  lv_obj_t *label = lv_label_create(scr);
  lv_obj_add_style(label, &style_title, 0);
  lv_label_set_text(label, "Hello world - testing long text");
  lv_label_set_long_mode(label, LV_LABEL_LONG_SCROLL_CIRCULAR);
  lv_obj_set_width(label, 150);
  lv_obj_align(label, LV_ALIGN_CENTER, 0, 0);
  lv_scr_load(scr);
}
Putting it all together:
The output of the above looks like the following:
Conclusion
Performance of LVGL on the ESP32 with this module is quite satisfactory even though the hardware interface is SPI. Its able to render animations and fast UI updates with ease without any artifacts or glitches.