Motion sensors are an easy way to add superb usability (and “smartness”) to your Smart home setup, they can be used to trigger lights, alarms, as notification triggers or even as conditionals within complex automations. These are relatively easy to setup and will help in understanding automations with physical triggers.
Basic principle behind a motion sensor for Home Assistant is fairly simple, detect the motion somehow, usually through a PIR or a microwave sensor and post the event to an MQTT topic which is then listened on by the Home Assistant server.
There are a lot of PIR motion sensors available commercially which can be added to Home Assistant easily. Most of them however need an internet connection to work or to configure them. Only a handful of them support true within-network operation. This is a huge deal if you ask me, why should a motion sensor need an internet connection if all I want is to turn on a light in the porch when motion is detected.
Another issue is the availability of these sensors in the Indian market. Smart Home scene in India gaining popularity, however like everything else, high end Smart Homes are becoming common these days, but DIY/semi DIY stuff is super rare! Finding the sensors are hard, of course you’ll see a lot online(& offline), but 95% of them are just rebranded Tuya devices and the other 5% are imports with a hefty price tag!
Design Considerations/Wants
Below are the main points that I wanted to address with my version of the sensor:
- Offline first - No cloud
- Cheap & easy to build - Everything should be available locally
- Full Home Assistant Support
- Battery should last a while
- Bonus - Measure temperature & humidity as well
Point #5 makes it a multi sensor if you may!
Hardware
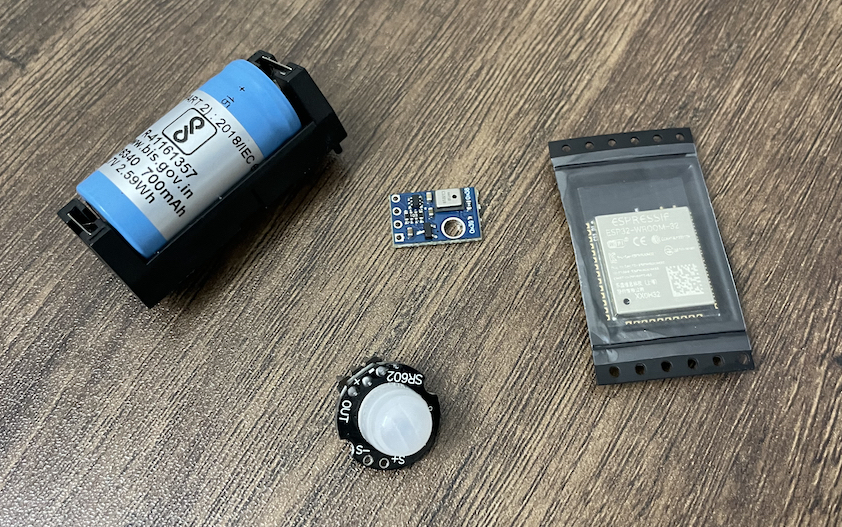
The SR602 PIR motion sensor was chosen for the sensing part, this was chosen since it is very small in size, can operate at 3.3v, consumes low current during stand by & offers a fairly large detection range considering the size. Microcontroller of choice is an ESP32 in the WROOM32D SOM form factor, it was an obvious choice since I had a bunch laying around & quite reliable. For temperature & humidity reading, I’ve used the AHT10 sensor & for the power source, I’ve used a CR123A Li-Ion battery. This battery is an excellent choice if you’re going to use an ESP32 or a micro controller that runs at 3.3v.
Wiring is pretty straight forward - AHT10 temperature humidity sensor is connected to the ESP32 I2C pins and the SR602 sensor output is connected to GPIO 15. An LED is connected to PIN 12 to provide visual feedback once motion is detected or when the sensor wakes up.
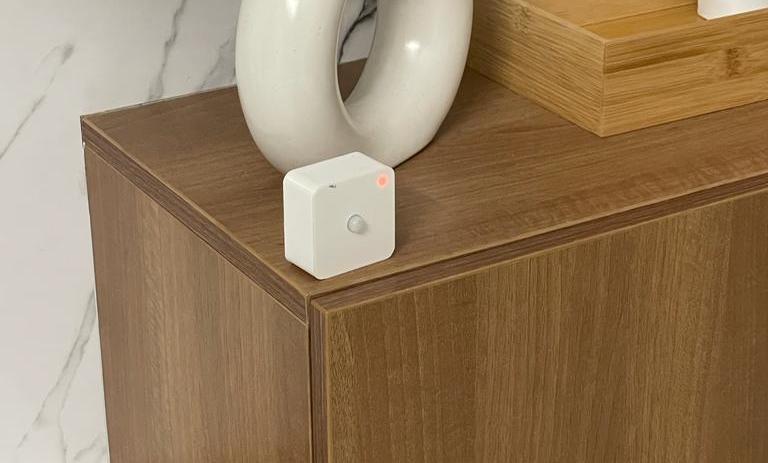
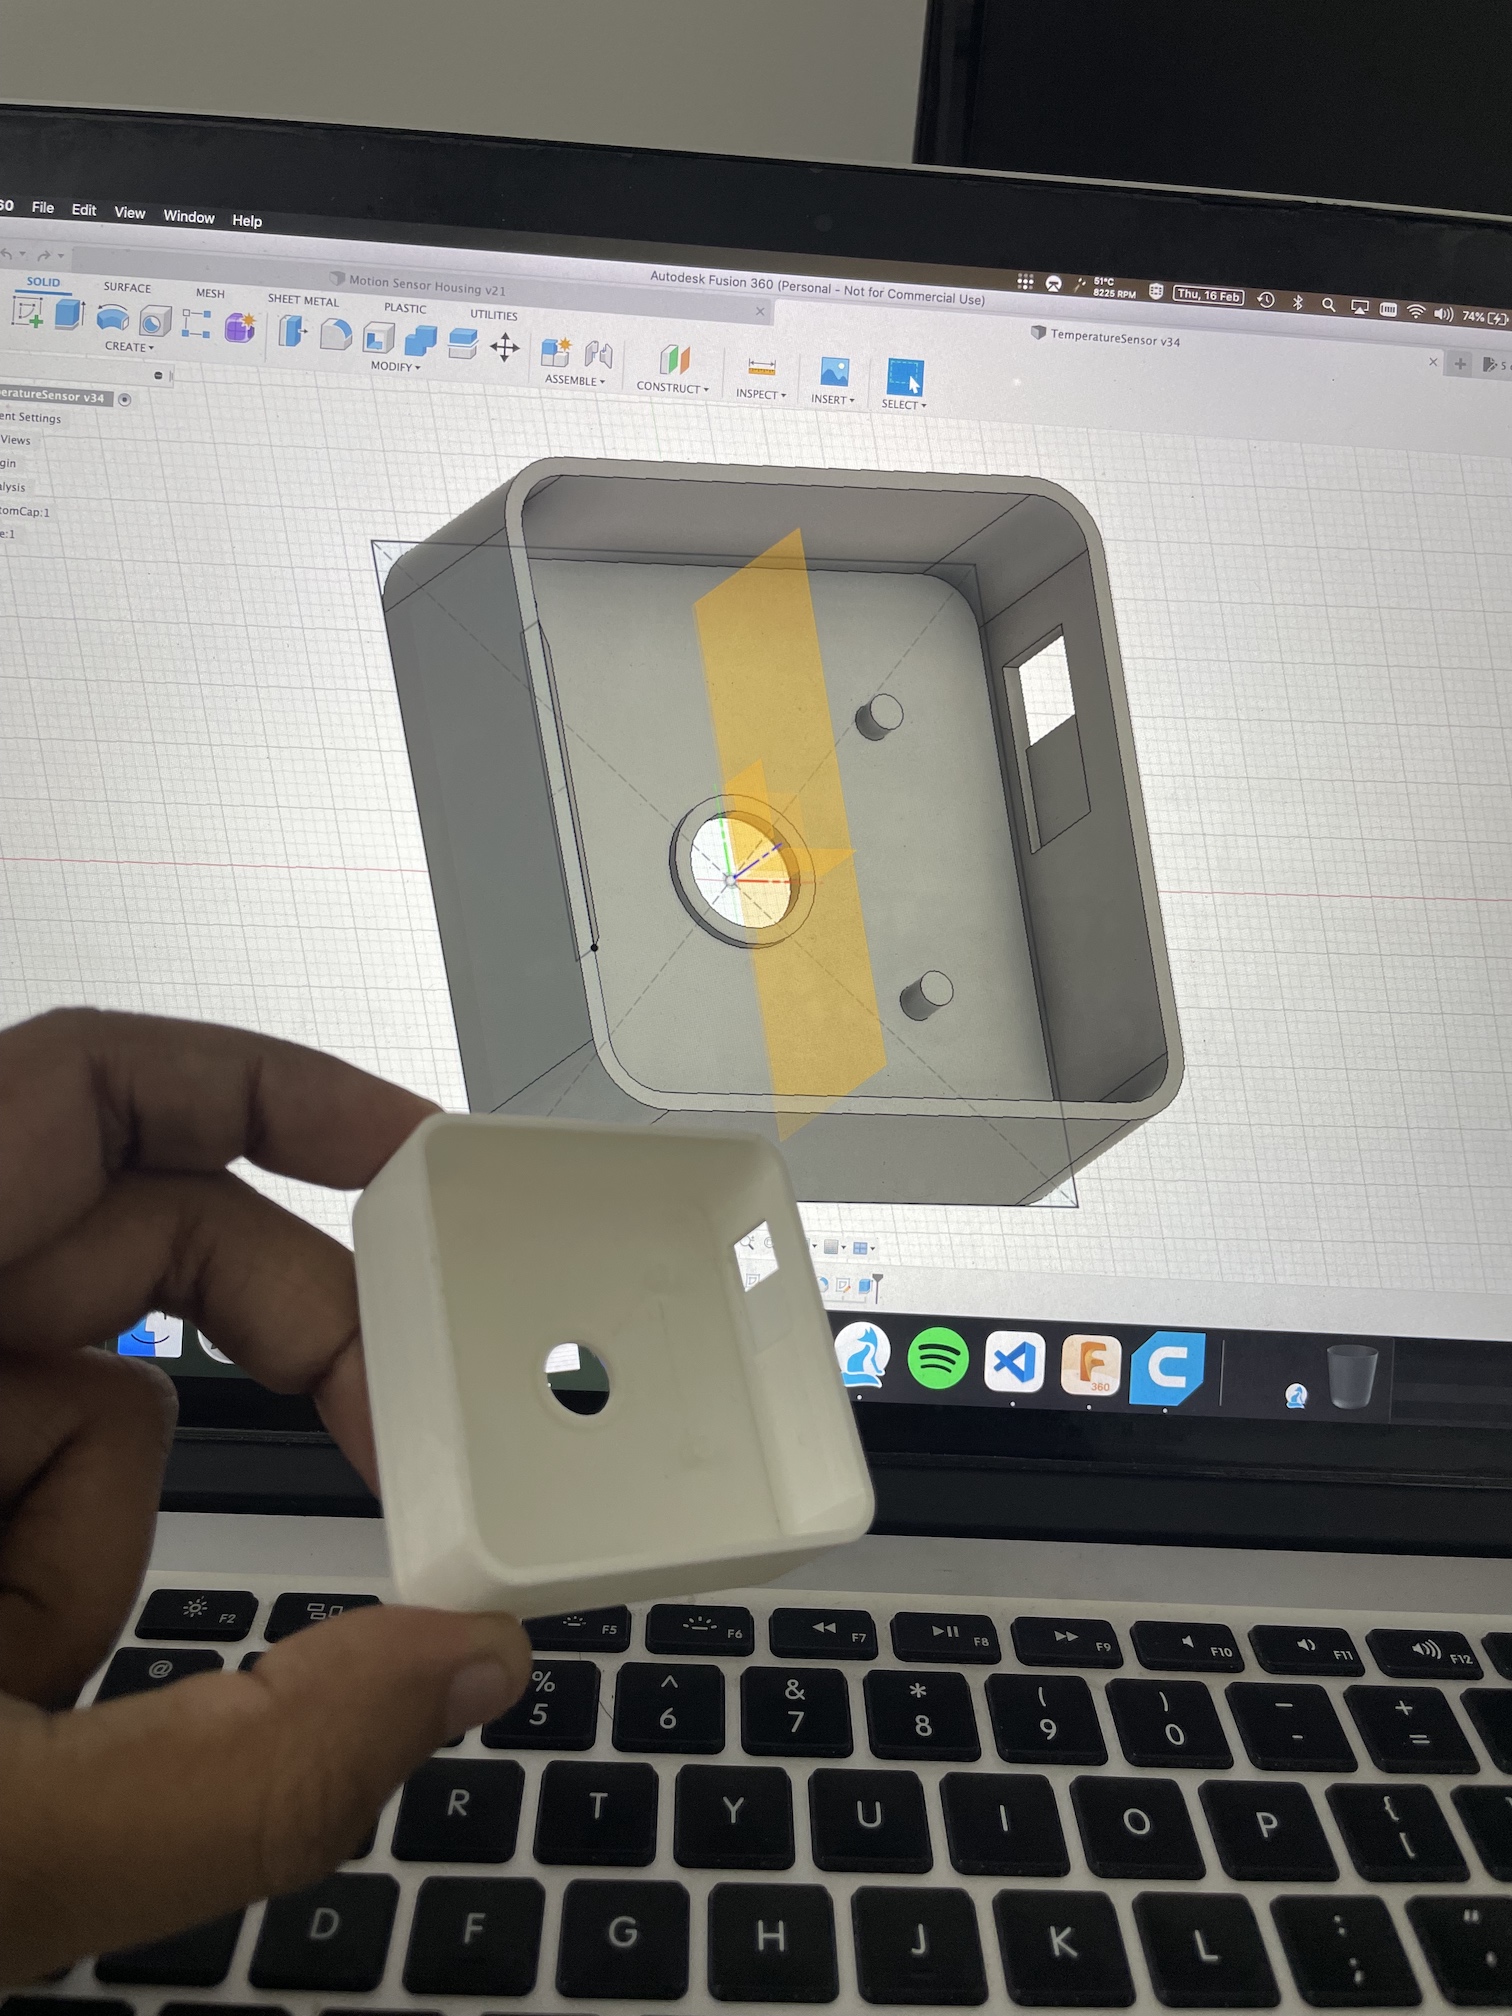
All of the above electronics were enclosed in a custom built 3D printed case designed using Fusion 360. You can download the STL files to print here: https://www.thingiverse.com/thing:5868311.
Software
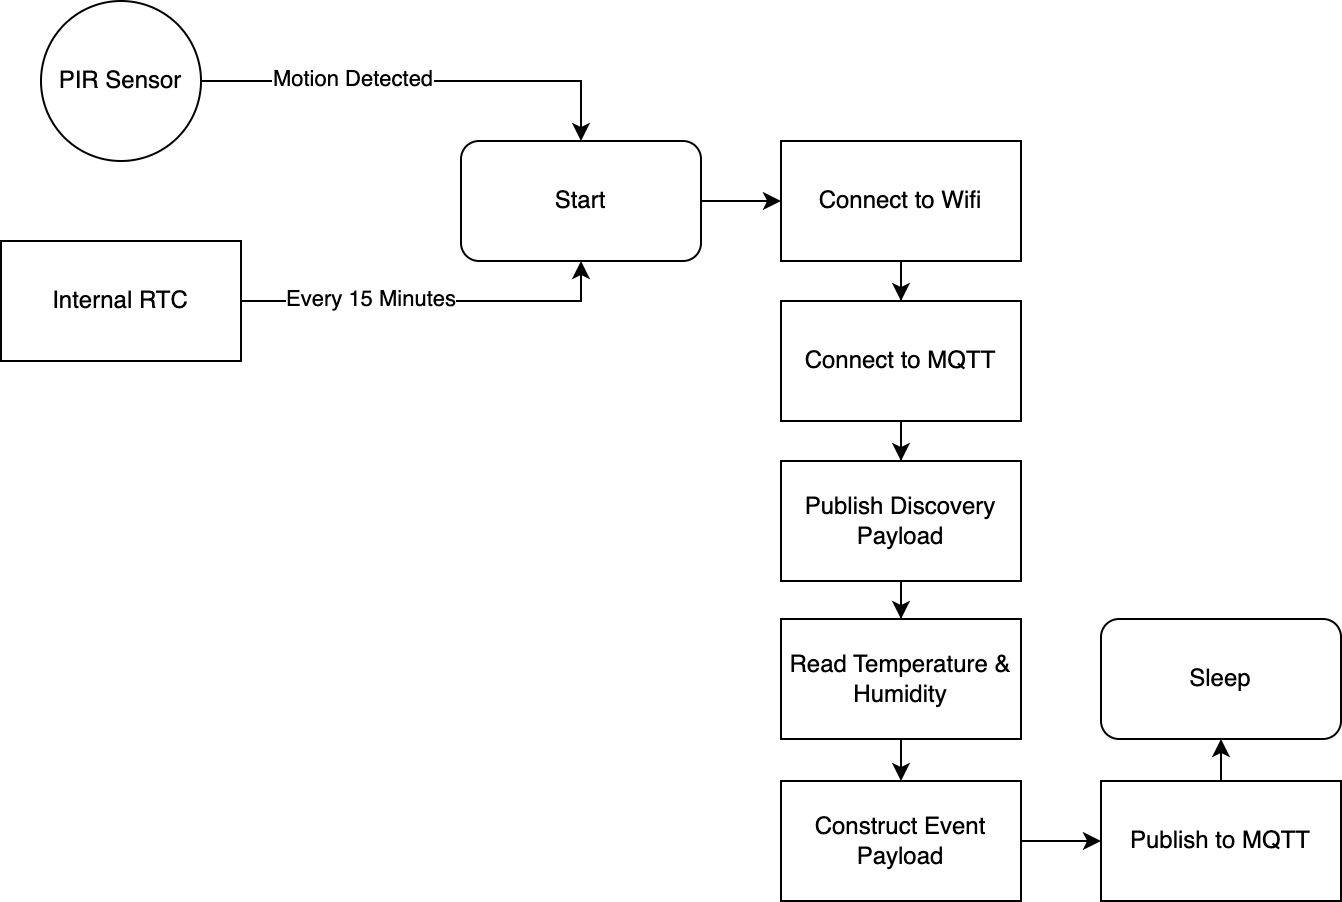
I’ve used PlatformIO with Arduino framework for the software part. The microcontroller is in deep sleep mode most of the time and is woken up by an external interrupt by the SR602 PIR sensor or by an internal RTC wakeup signal for sending the temperature & humidity values. Since this is a multi sensor with temperature & humidity sensors, the internal RTC is configured to wake the microcontroller every 10 minutes, once the microcontroller starts, the following stuff happens:
Deep sleep is handled with the following:
// Bitmask to enable external interrupt on GPIO 2 & 15
#define BUTTON_PIN_BITMASK 0x8004

//Microseconds to seconds multiplier
#define uS_TO_S_FACTOR 1000000

//Sleep time in seconds
#define TIME_TO_SLEEP 600

//Function to enable the periodic wake up timer
esp_sleep_enable_timer_wakeup(TIME_TO_SLEEP * uS_TO_S_FACTOR);

//Function to enable external interrupt on pin 15
esp_sleep_enable_ext1_wakeup(BUTTON_PIN_BITMASK,ESP_EXT1_WAKEUP_ANY_HIGH);

//Start deep sleep, once this function is called, the uC goes to deep sleep
esp_deep_sleep_start();
The temperature and humidity data will be published everytime a motion is detected via external interrupt or every 10 minutes if no motnion is detected via the internal RTC wakup function.
Home Assistant has an excellent MQTT based auto discovery feature which can be leveraged while building custom sensors. Its fairly simple(and can get really complex if you want) to implement and provides a near ‘works out of the box’ experience for custom sensors. Read more on MQTT discovery here: https://www.home-assistant.io/integrations/mqtt/#mqtt-discovery
The event and discovery payloads are created with the help of Sensor & Binary Sensor integrations of Home Assistant.
You can find the full code here: https://github.com/vsaravind007/diy-motion-sensor
The discovery payload for the motion event looks like the following:
void sendMQTTMotionDiscoveryMsg()
{
  String discoveryTopic = "homeassistant/binary_sensor/temp_motion_sensors/config";
  DynamicJsonDocument doc(512);
  char buffer[256];
  doc["name"] = "Multi Sensor - Motion"; //Name of the event
  doc["dev_cla"] = "motion"; //Device class
  doc["stat_t"]   = stateTopic; //Topic where the sensor state will be published
  doc["unique_id"] = "multi_sensor_1_motion"; //Unique ID
  doc["val_tpl"] = "{{ value_json.motionDetected|default(0) }}"; //Where to find the value within the state payload & its default value if not exists
  size_t n = serializeJson(doc, buffer);
  client.publish(discoveryTopic.c_str(), buffer, n); //Publish the discovery message
}
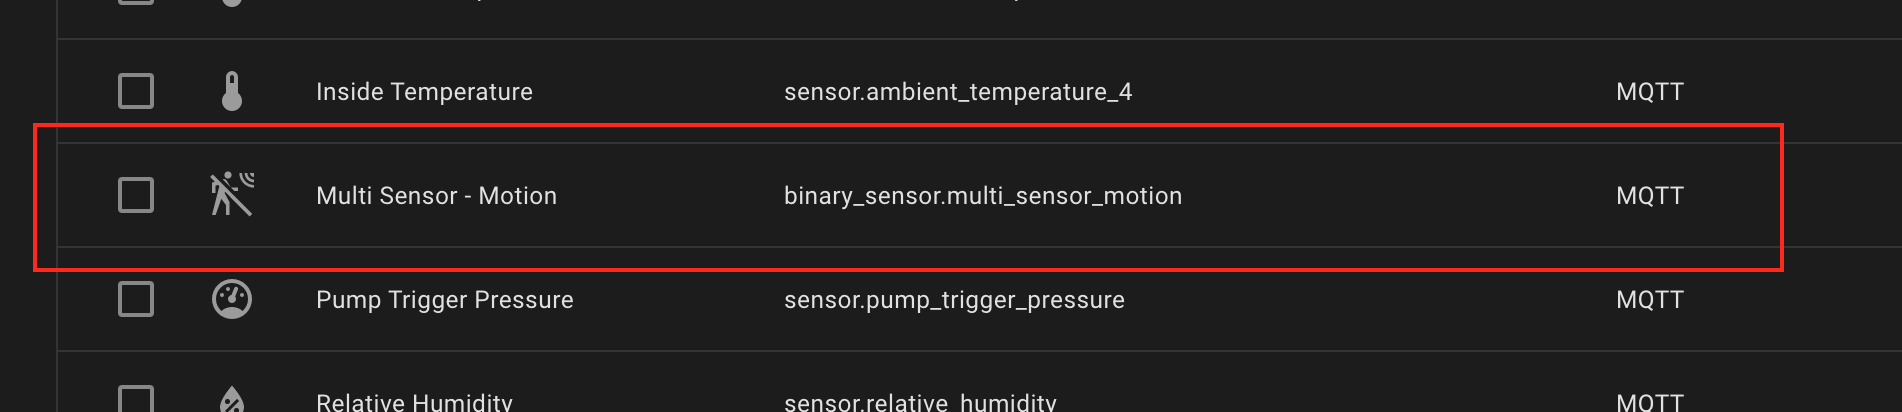
The above code will generate & publish the device discovery message and it shows up like this in Home Assistant:
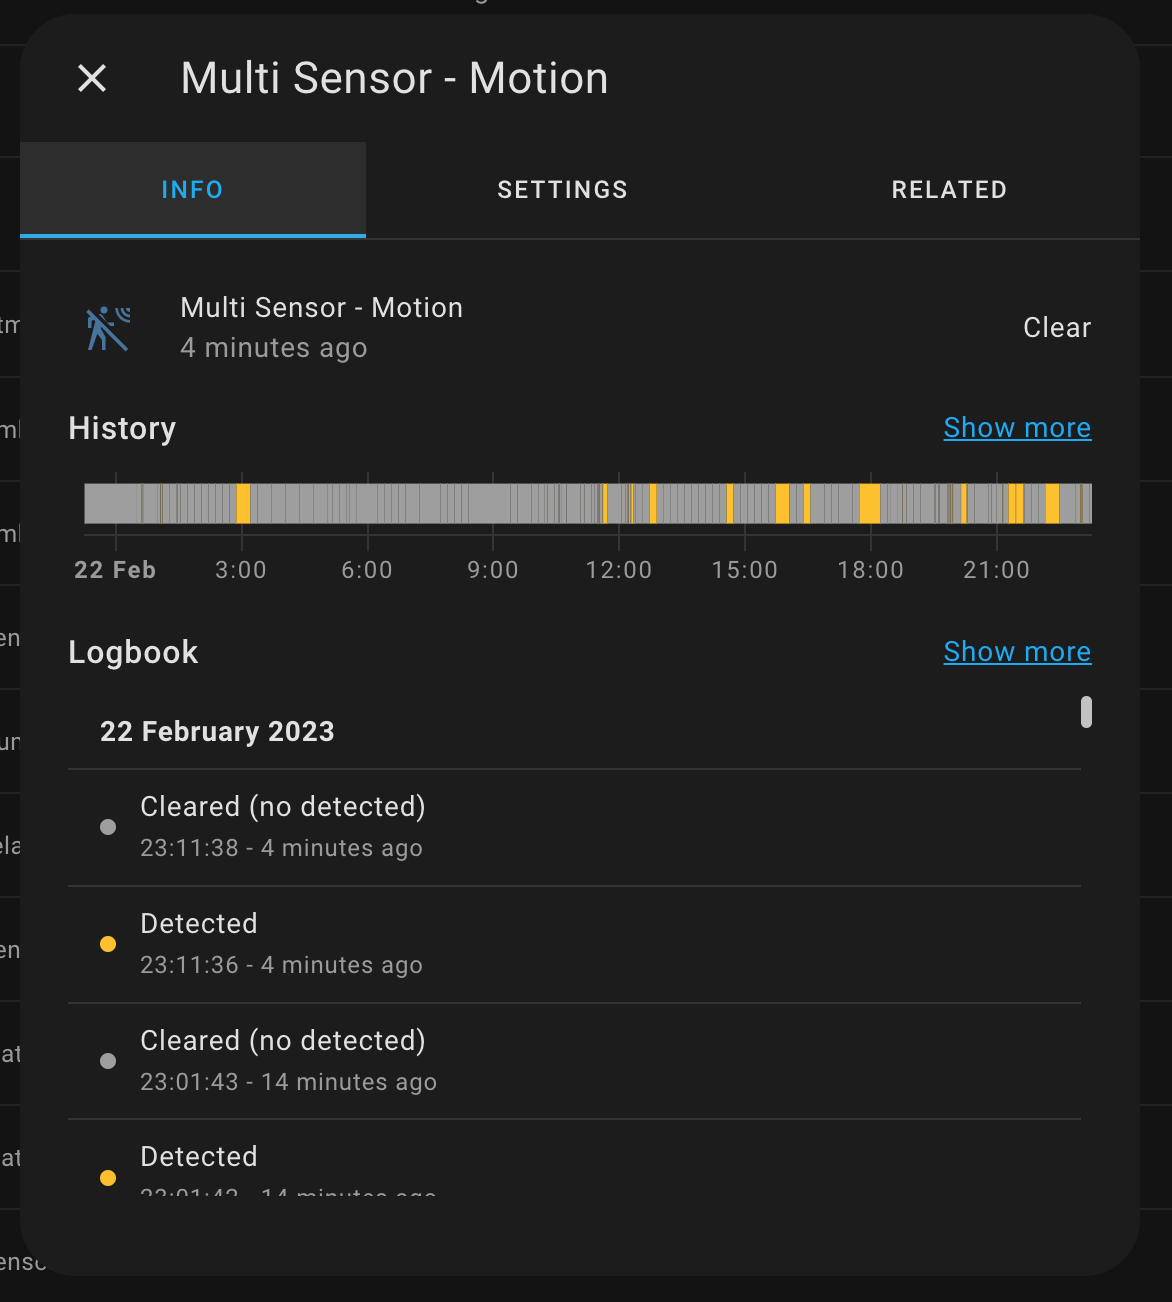
Once the device starts publishing data, you’ll be able to see the events & history within Home Assistant like this:
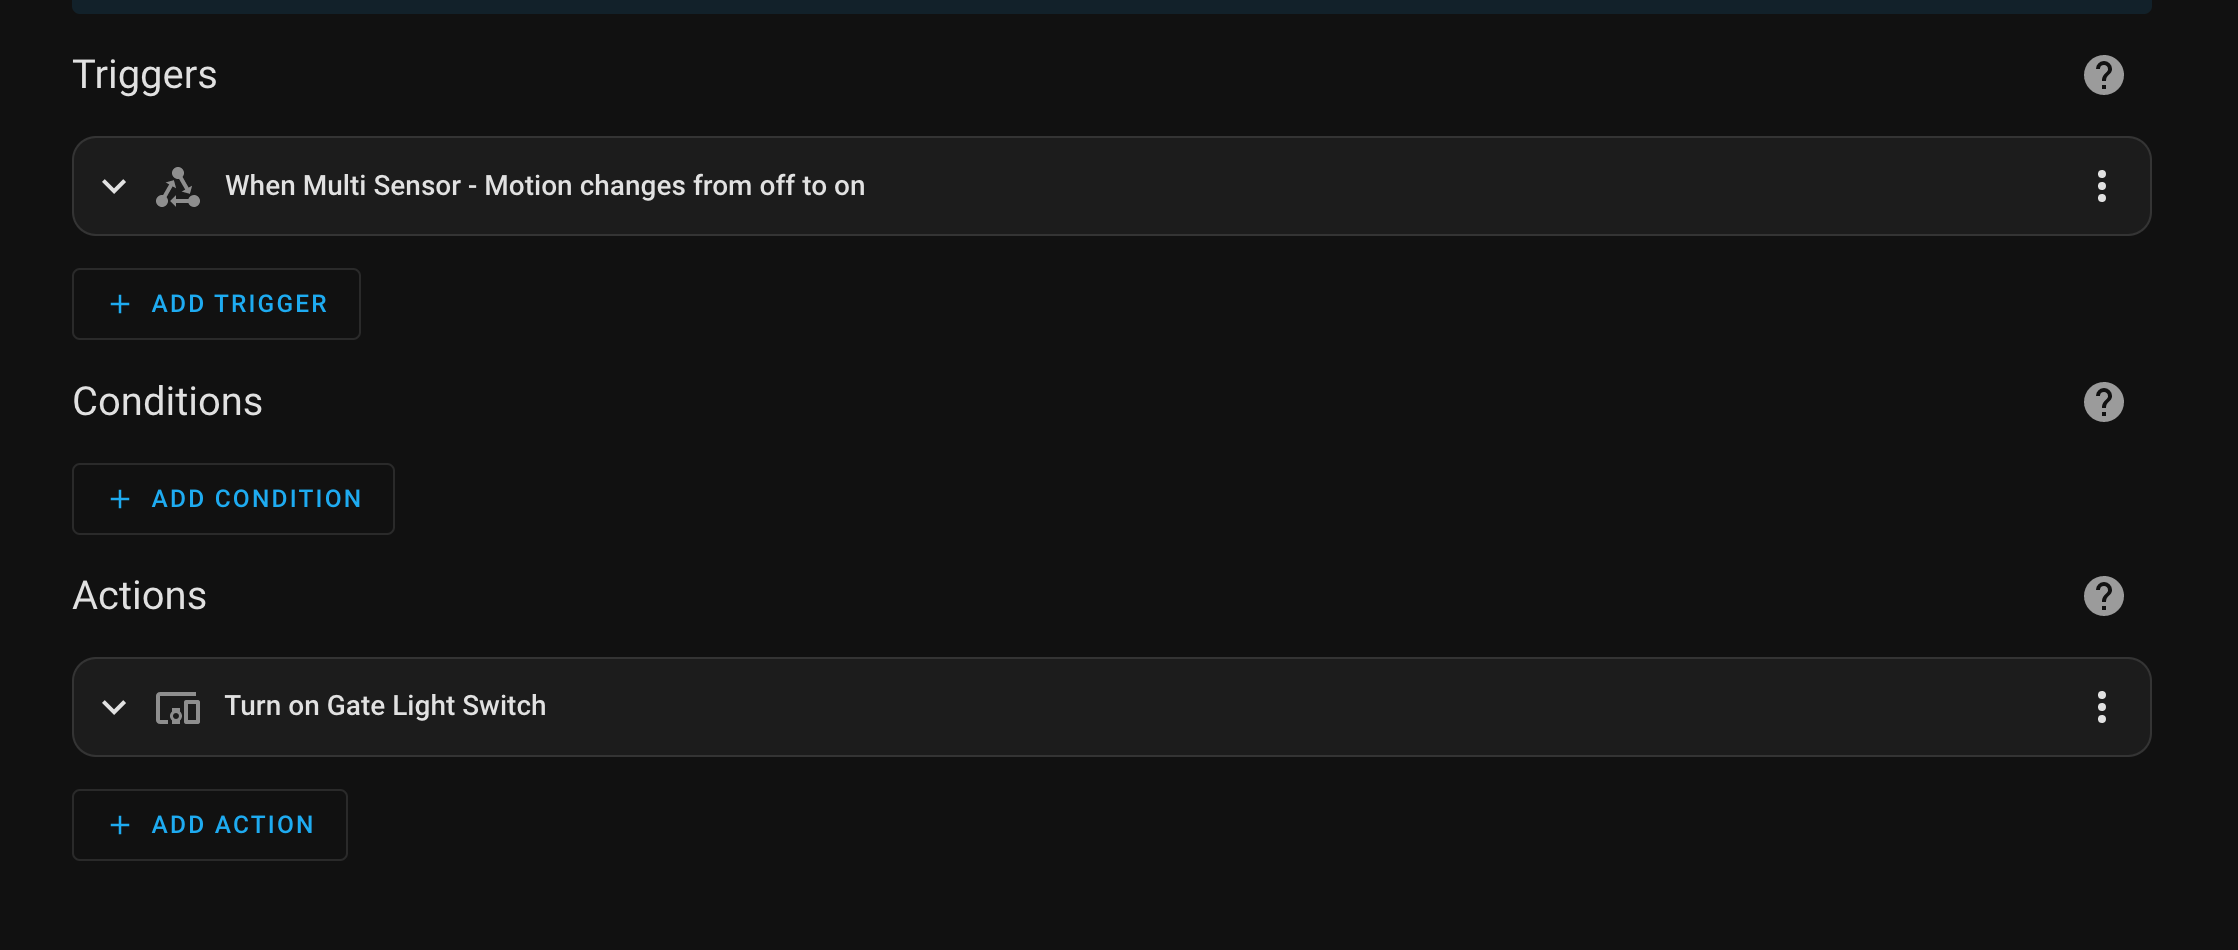
In addition to this, you’ll also be able to use the motion trigger in your automations. In the following example, I’m turning on the gate light ON once motion is detected:
Conclusion
The sensor has been working flawlessly since the last few weeks. Must say that I’m pretty impressed by it so far. Will keep this thread updated with long term usage & battery life.
Since there is no battery protection circuitry now, only time will tell how long the battery will last, the plan now is to recharge the battery once the sensor stops sending data. Have setup an automation to trigger an alert if the sensor go silent for 2hrs - since the temperature & humidity data is published every 10mins, its easy to detect that the sensor has died.
Thanks for reading!