Motion activated lights using PIR sensors in home assitant can become frustrating if your automation is relying on motion detected / not detected for controlling the light, if you’re using simple PIR motion sensors, chances are that they’ve a cool off period which isn’t very suitable for reliable ON/OFF control. You could end up in sitations where you’re still in the area but the sensor turned the light off, you’ll have to wave your hands or move a little to turn them light back on.
The video above shows the setup I’ve in my kitchen, the sensor is placed in a location that is optimal - no false triggers!Though it seems quite obvious, the fundamental thing to note here is that a PIR motion sensor is a “Motion” sensor and not a “Presence” sensor. What it means is that, the sensor is capable of detecting motion and motion only - it cannot and will not be able to distinguish between a person who is sitting idle in a chair.
This is an issue if you want to setup a light automation where you want to keep the lights ON when someone is in a room/area and want to keep it ON as long as they’re still there.
PIR Motion Sensors & Limitations
Though these sensors can technically detect presence, they’re tuned to detect motion. The sensing element in these senors are crude IR cameras that detect the IR radiation and passes the info to a DSP which then determines if the data is motion or not and transmitted. Most common version of PIR motion sensors are Zigbee PIR motion sensors. These devices are very power efficient and can last a very long time on coin cells.
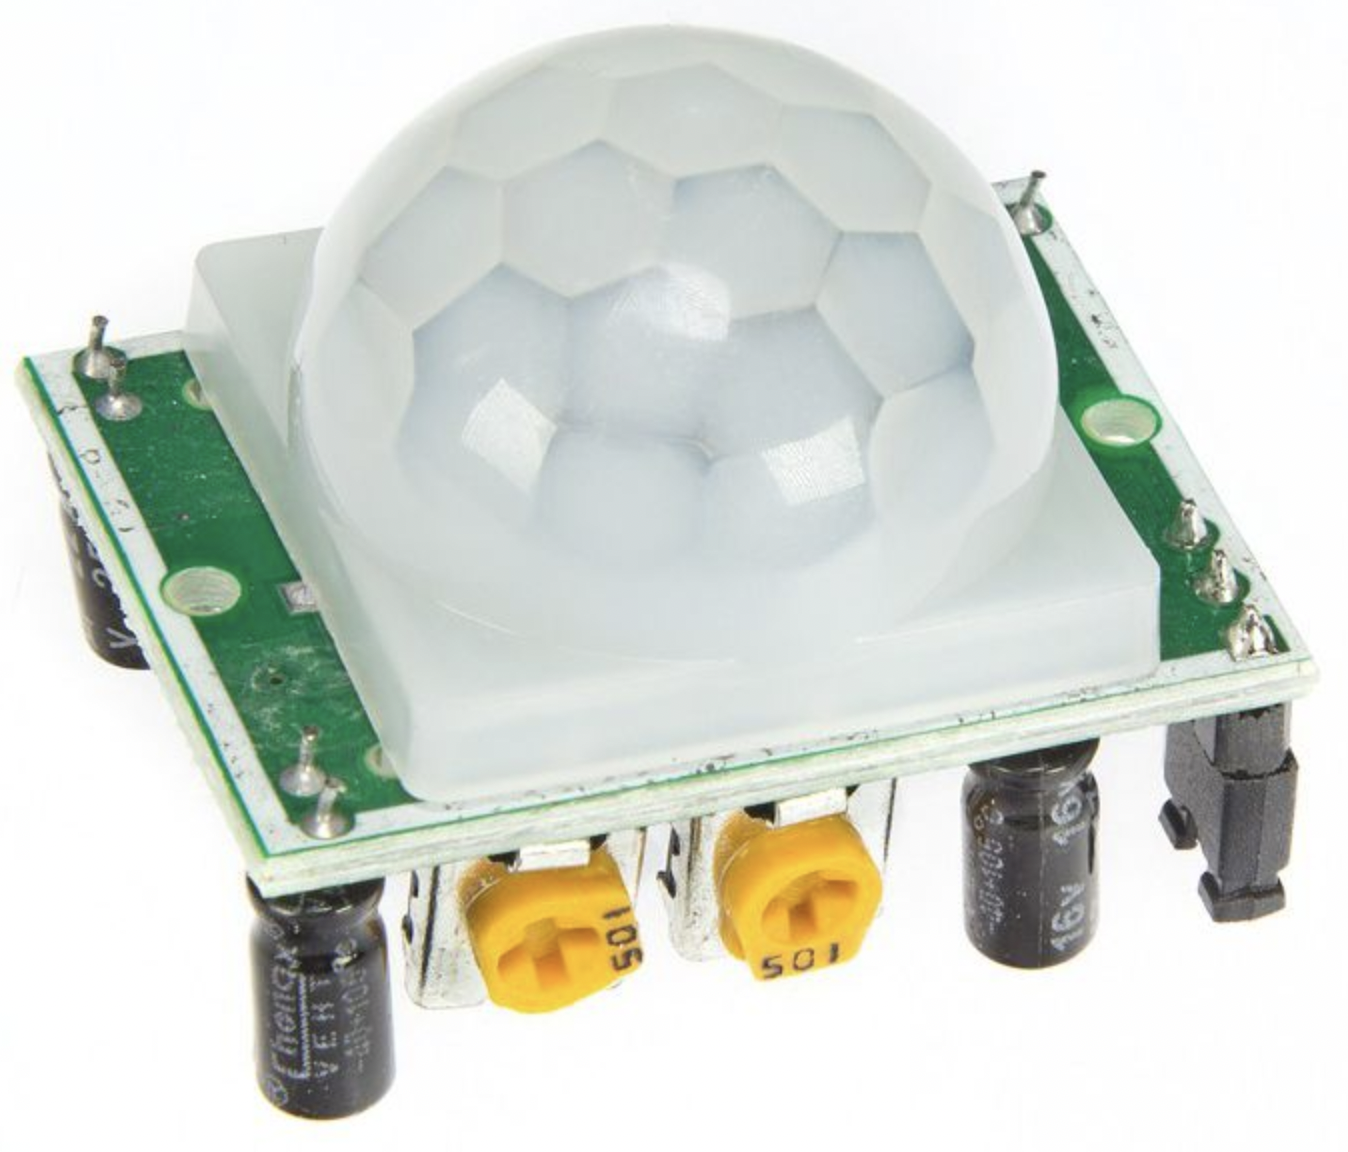
Zigbee sensors are widely used because of their simplicity, availability and the ease of use with Home Assistant eco system. The one I use in my smart home are SonOff SNZB-03 Zigbee Motion Sensors, this one specifically: https://amzn.to/3GuPwmO. I’m also using a few sensors I’ve built myself: https://blog.aravindvs.com/posts/diy-motion-sensor-for-home-assistant/
When/Where to Use PIR Motion Sensors
PIR motion sensors CANNOT be used in cases where you want to detect presence, an example would be someone occupying a space like sitting in a sofa or a chair with minimal movement. Though the sensor can trigger when the person moves to(or into) or out of the space, but will reset after the cool off period if the person stays stationary for some time. This is problematic if you are going to rely on the presense detection by the motion sensor to keep the lights on or do something else.
All PIR motion sensors will send an “unoccupied” event when it detects no motion for some time & will delay sending it if there is movement detected after the cool off period.
In general, use a PIR sensor if:
- The area to be monitored is a moderate to high activity area - Example would be a kitchen or work area
- Sensor’s field of view or coverage area should be able to cover the area of activity
- There shouldn’t be any machinery/lights that can create false positives like IR lights or cameras with IR lights
Configuring Lights w/ PIR Sensors In HomeAssistant
Configuring a PIR motion sensor in HomeAssitant can be done in a number of ways, however the method I’m going to showcase works the best in a scenario where a high activity area is to be monitored/controlled, this method will help minimize the chances of HomeAssistant turning off the lights when there is a person.
Logic
The logic for this approach has 2 parts - Turning ON the lights & turning OFF the lights based on a timer.
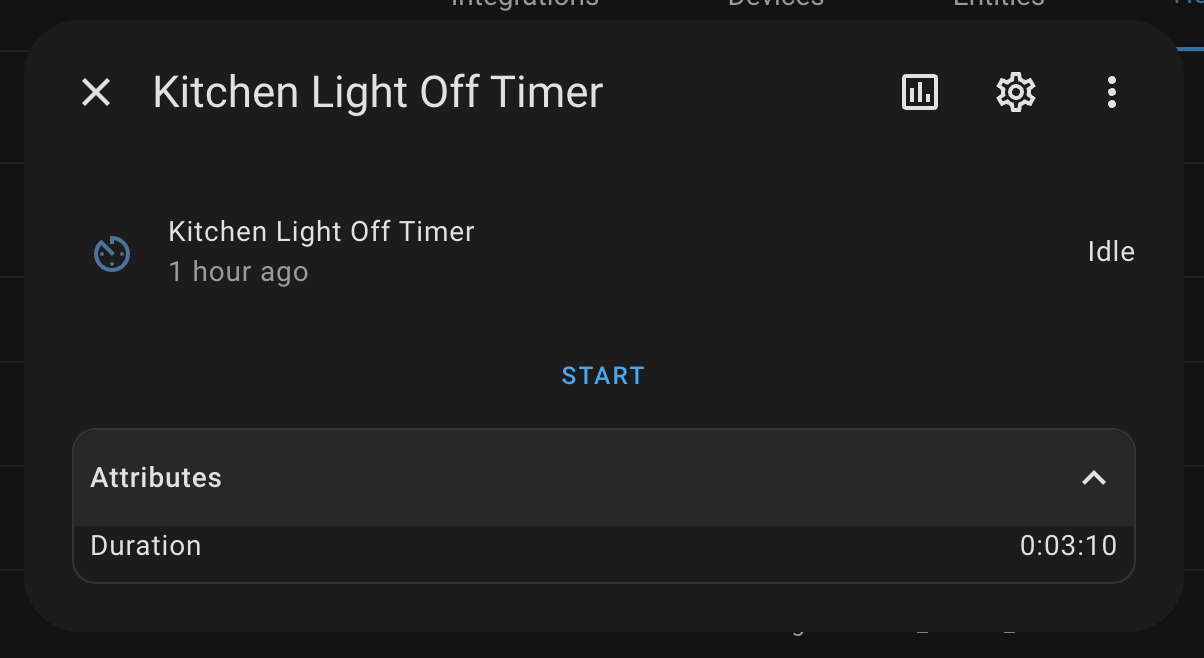
Timer
The off automation has a timer part which counts down to 0. Duration of the timer has to be a few seconds more than the cool off period of the sensor. For example, the SonOff Zigbee PIR Motion Sensors has a cool off period of 3 minutes - the timer needs to be configured for 3 minutes & 10 seconds. This ensures a buffer for HomeAssistant to register the sensor status in case the sensor triggers motion again.
Light on logic
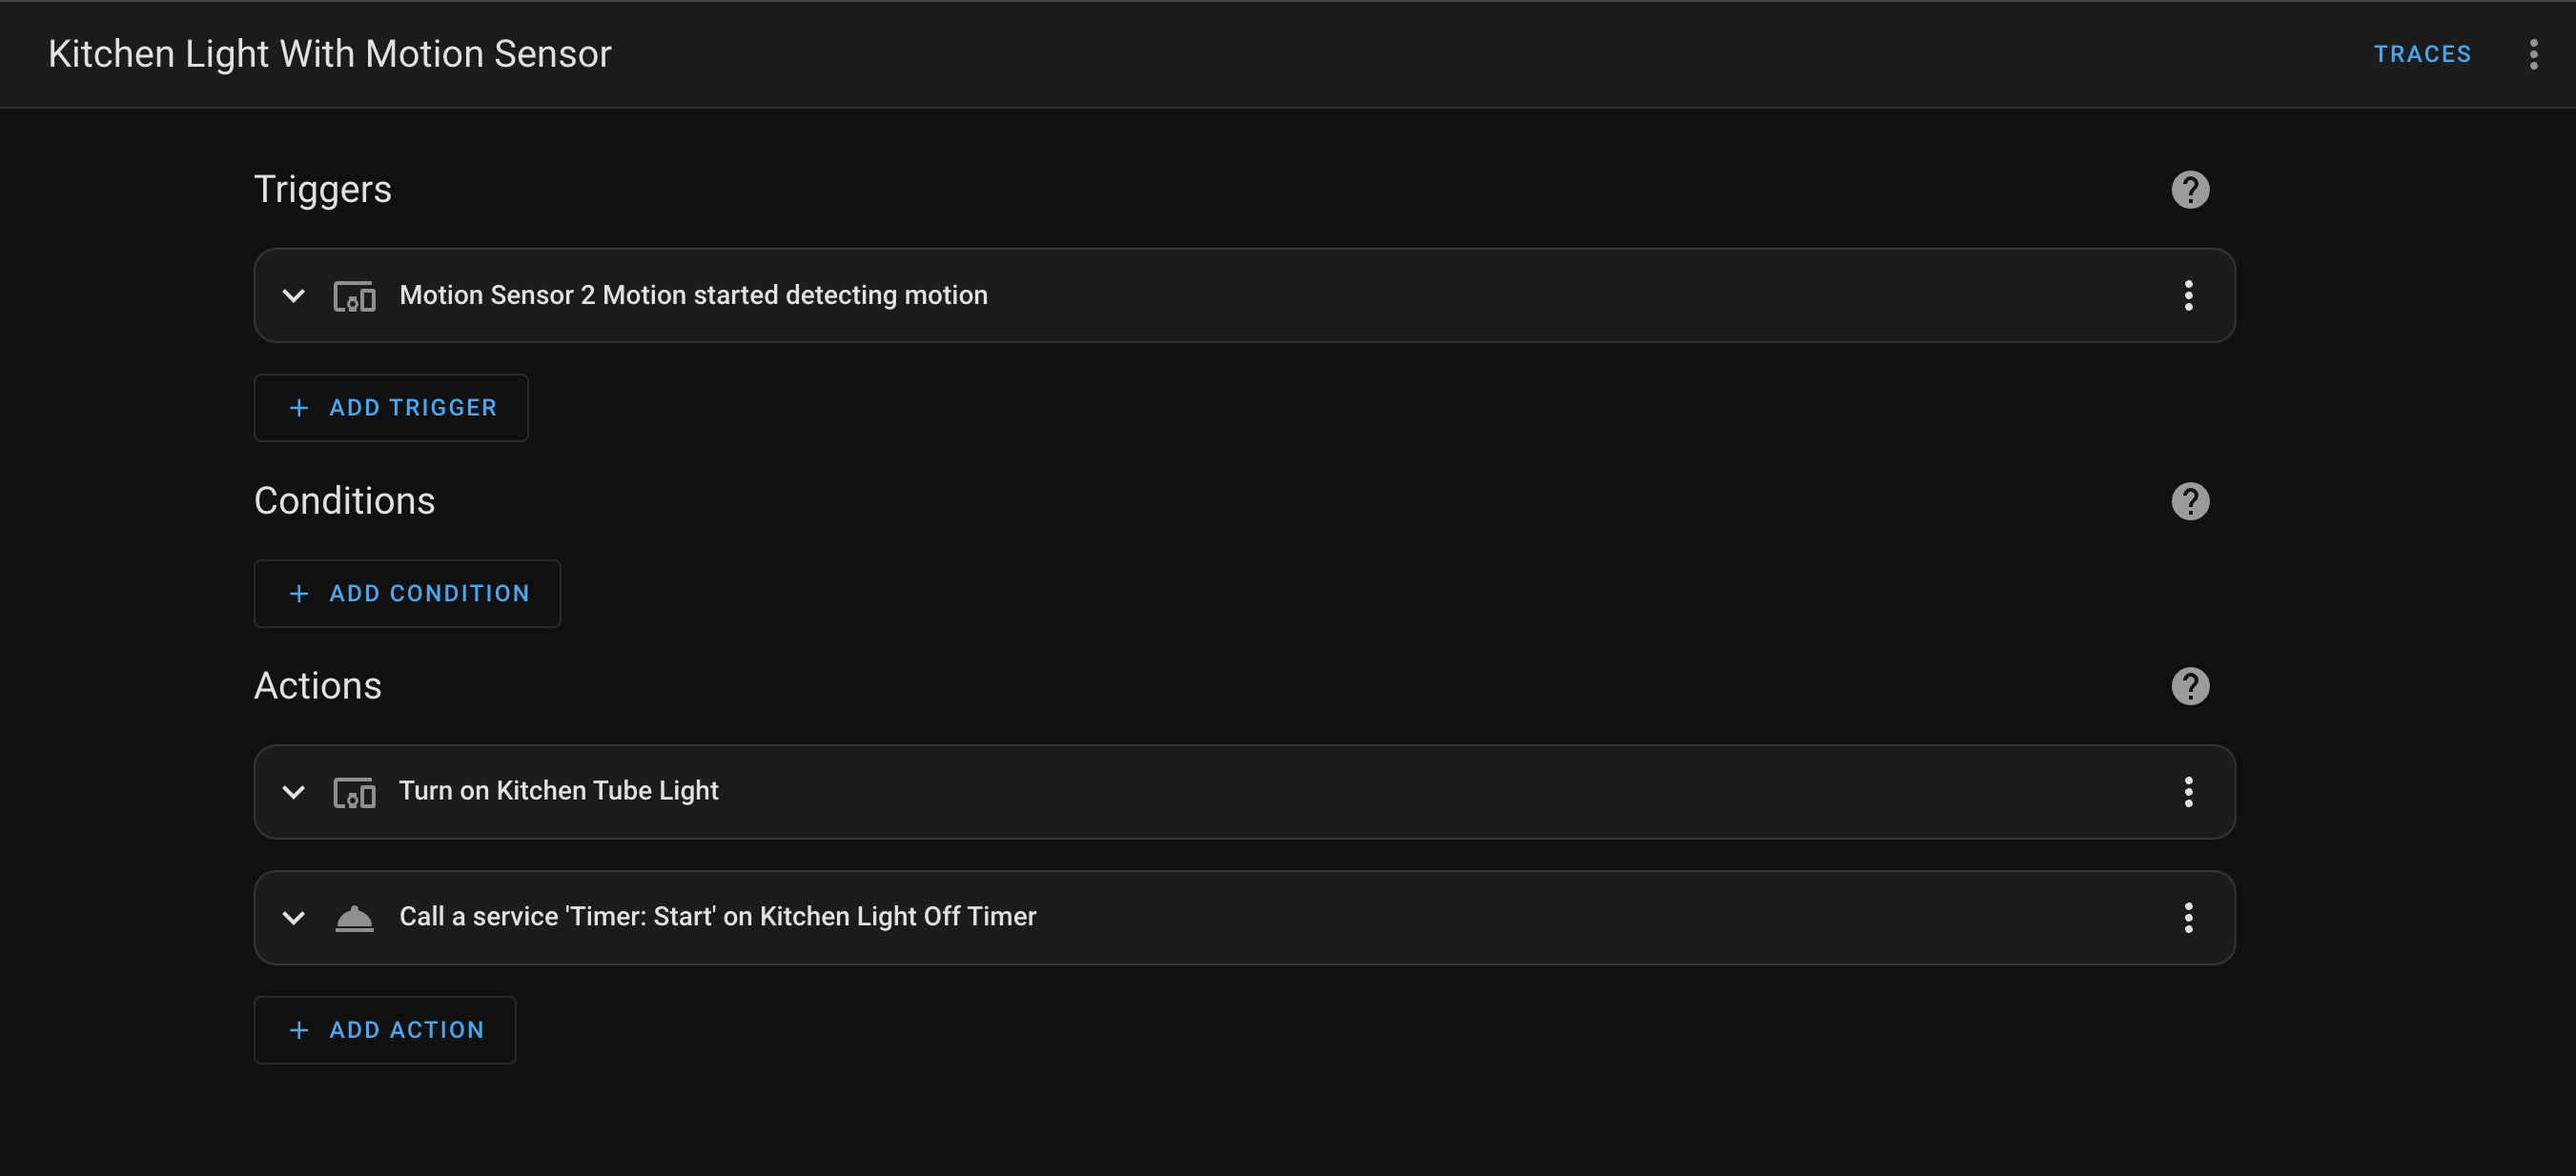
Turning the lights ON part remains basic - turn ON the lights when there is presence/motion detected by the sensor and start a timer.

This translates to the following HomeAssistant automation:
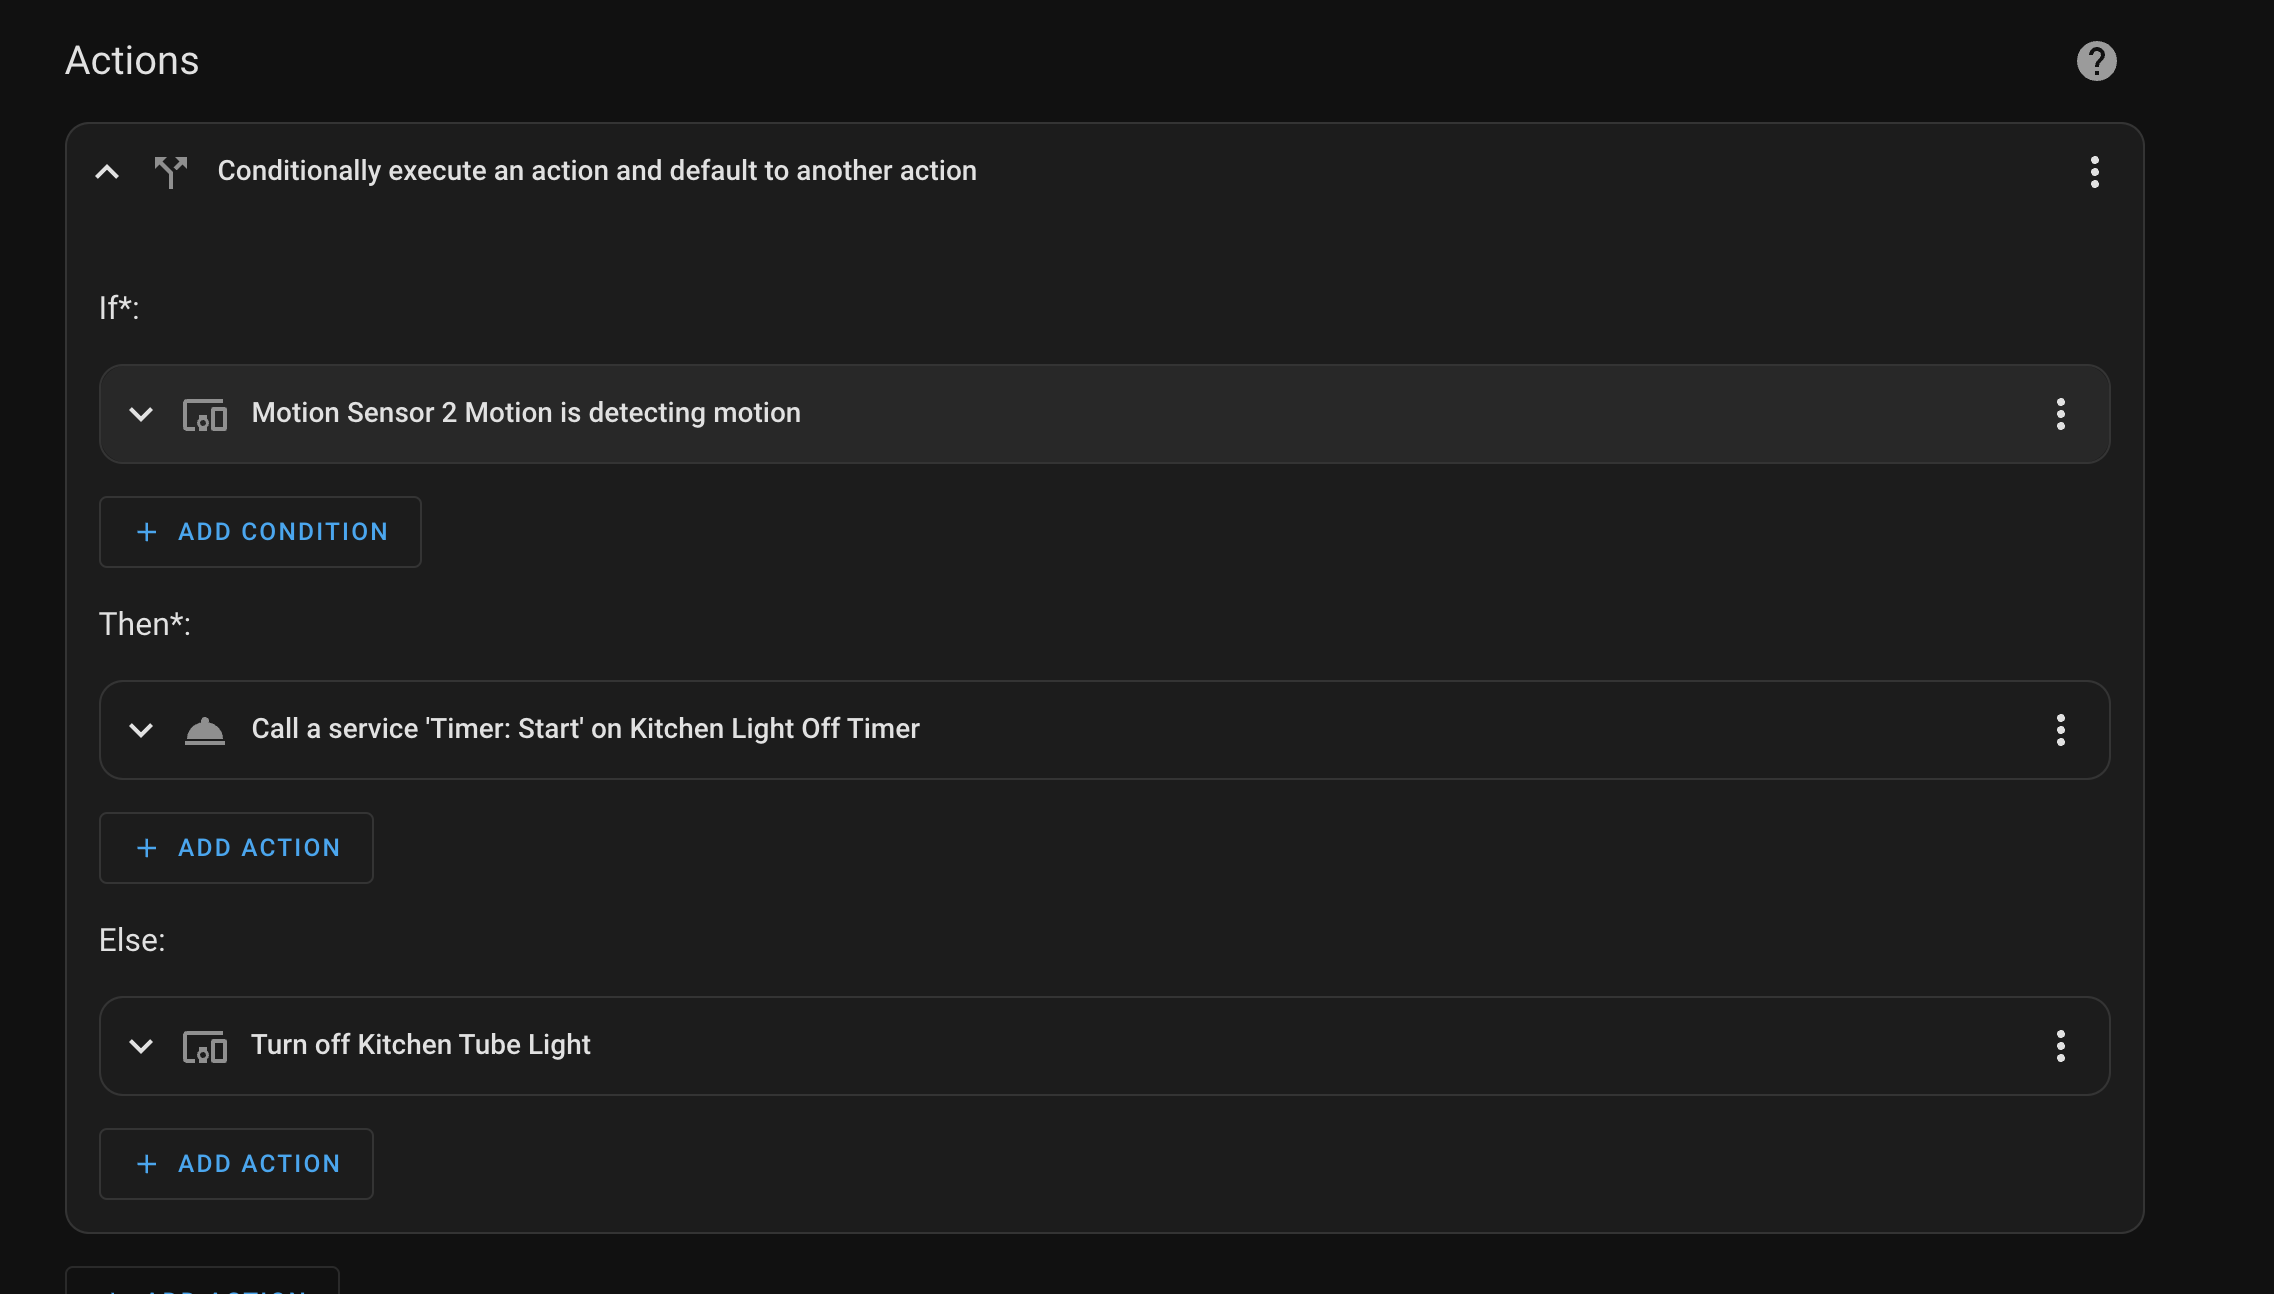
Light off logic
The light off part is where we have the main logic implemented, this automation will check the status of the sensor and in case it is still occupied, the timer is reset, turns off the light otherwise.
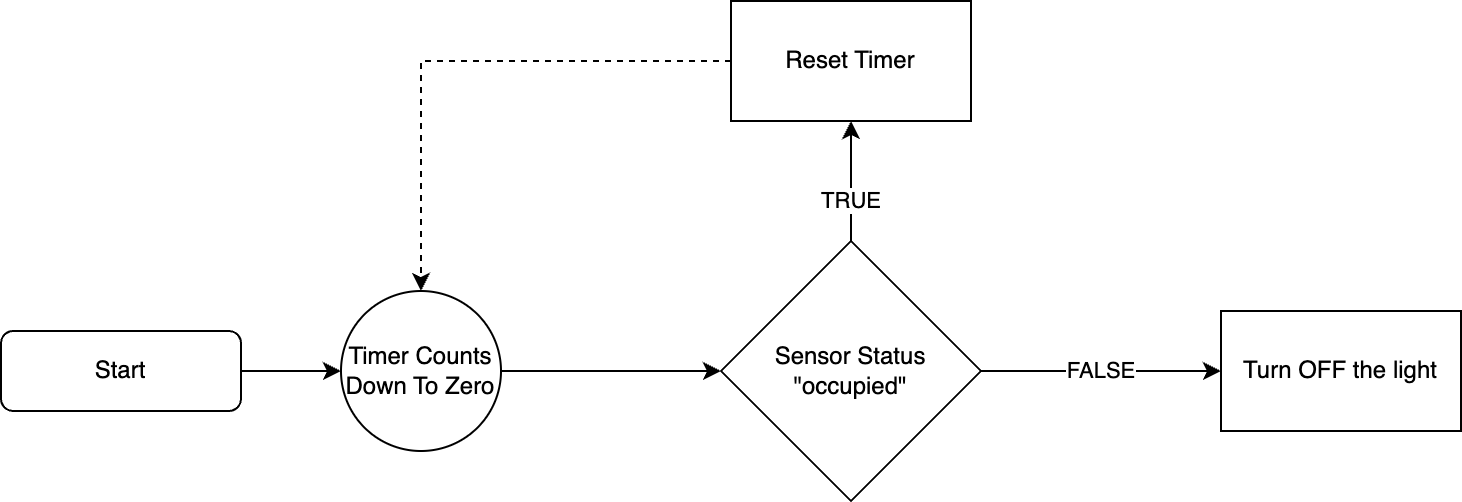
This translates to the following HomeAssistant automation:

This setup has been working with high reliability in my home since the last few months. Though this setup works 99% of time time, there are some cases where the light will flash if the person stays dead still.
I’m currently in the process of implementing mmWave radar sensors which are highly sensitive and accurate to detect presence in a room or area.